If the soft strip around a door has flattened or come away, replacing it may help close the gap. The aim is a seal that makes contact when the door closes—not a door you have to shoulder shut.
For an ordinary, accessible exterior door that already closes and latches correctly, using adhesive-backed weatherstripping approved for its frame and exposure. This does not cover fire-rated or smoke-control doors, garage-to-house doors, kerf-in seals, metal spring strips, thresholds or door sweeps.
Tools you need
- Tape measure or ruler — Measure each section and the relevant seal dimensions.
- Suitable scissors — Cut the selected soft strip only if its instructions permit scissors.
Materials
- Compatible adhesive-backed weatherstripping in the profile and gap range specified for the door.
- Soft cloth and cleaning materials permitted by the frame finish and strip instructions.
- A container for the removed material.
Before you start
Stop if the door sticks, will not latch, has rotten or damaged framing, or carries a fire/smoke label. Have a door specialist assess it before altering its seals. If removing the strip lifts paint or exposes an unknown deteriorating coating, stop; do not sand or scrape it. Keep fingers clear of the closing edge.
1. Check the door before removing anything
Open, close and latch it normally. Inspect the old seal and note where it sits on the frame. A poorly aligned door needs its own repair; thicker foam is not a substitute. Leave designed drainage and ventilation openings unobstructed.
2. Match the replacement
Identify an adhesive-backed product intended for the surface, exposure and gap you have. Measure the top and both sides separately and record the measurements in the units used on the pack. For reference, 1 inch equals 25.4 mm; a similar-looking strip is not necessarily the same profile. Follow the selected product’s fitting and temperature requirements.
3. Remove and clean a small section first
Gently peel the old adhesive strip. Stop if it tears away paint or the surface beneath it. Clean using the finish-compatible method allowed by the new strip’s instructions, and allow the surface to dry fully. Do not layer new adhesive strip over the old one.
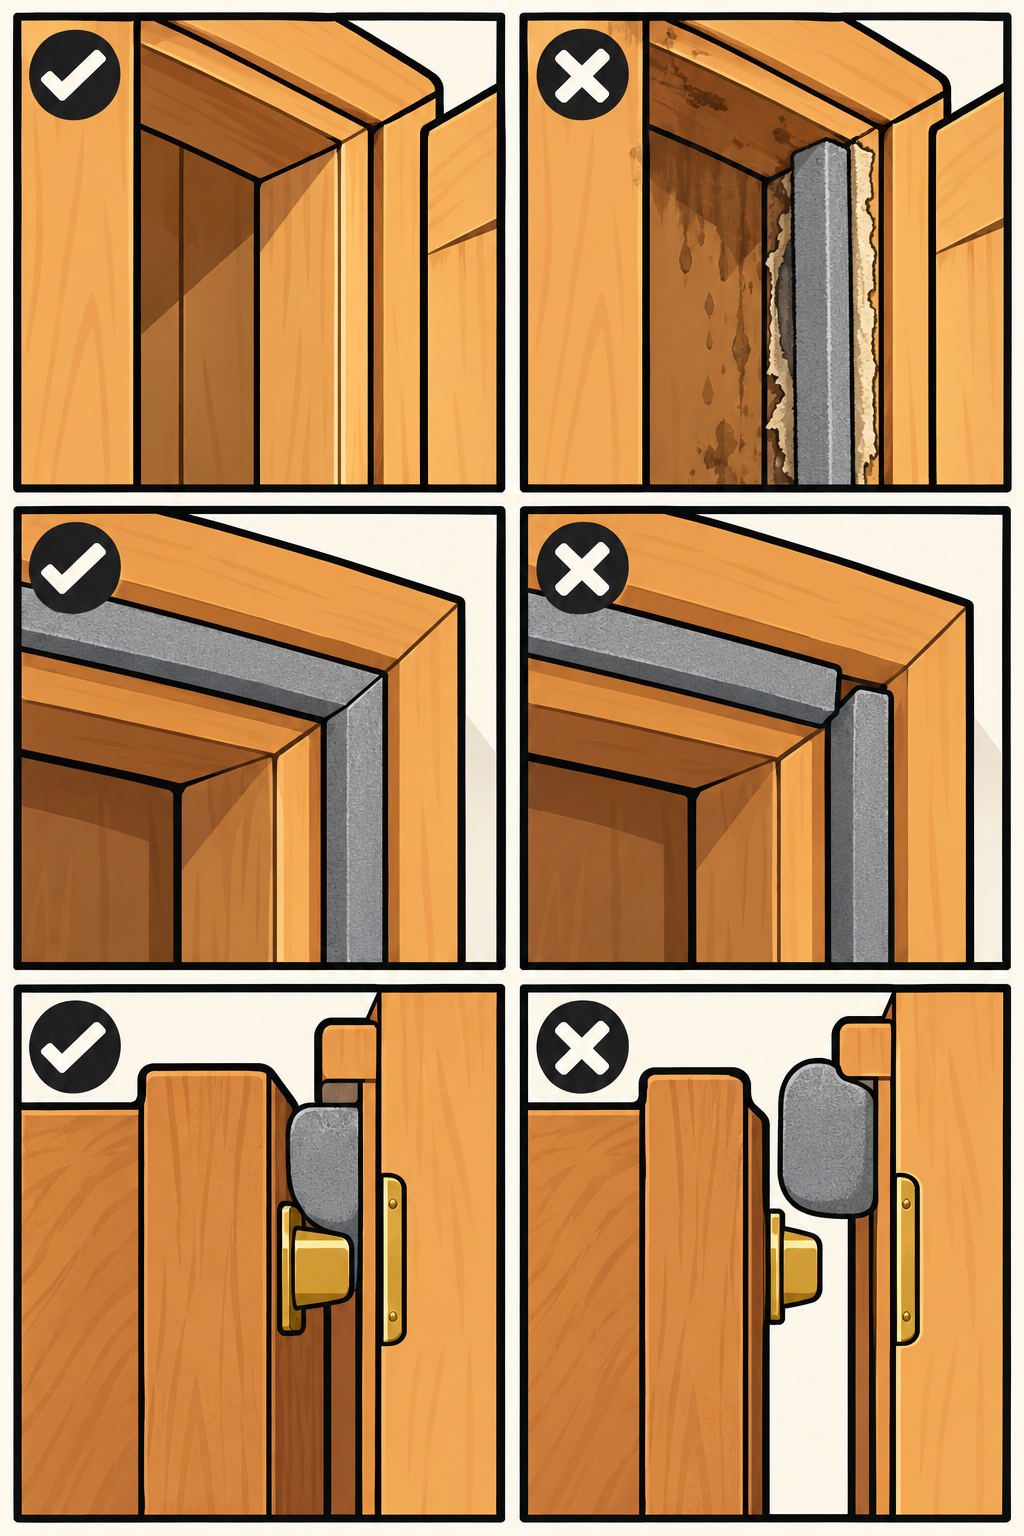
Original FixerToolbox schematic. Follow the instructions for your actual hardware; proportions are illustrative.
4. Measure again, then cut
Recheck each length before cutting. Cut the soft strip with the tool specified for it, on a stable surface and away from your fingers. Aim for continuous pieces along each section rather than a series of short patches. Follow the product’s corner-joint instructions.
5. Apply without forcing the fit
Place the strip along the specified contact line. Follow the pack’s method for removing the backing, pressing it down and any waiting period. Let it lie naturally rather than pulling it longer to reach a corner. The corners should meet without gaps or bulky overlaps.
Original FixerToolbox schematic. Follow the instructions for your actual hardware; proportions are illustrative.
6. Test closing and latching
After the specified bonding period, close the door gently and check that the strip contacts the door while allowing normal operation. Open and latch it several times. If it needs slamming or will not latch, stop and correct the selection or placement according to the instructions. Do not file the latch or move the strike plate to compensate.
Original FixerToolbox schematic. Follow the instructions for your actual hardware; proportions are illustrative.
Avoid these mistakes
- A thicker strip can prevent the door closing properly.
- Dirt, moisture or unsuitable application temperature can undermine adhesion.
- Sealing the top and sides does not fix a separate gap beneath the door; that needs a compatible bottom-seal solution.